How to Create Custom Clerk Auth Forms with Next, TypeScript, and Tailwind
Want to use Clerk for authentication with Next but style it how you want? Steve Smodish and Alex Curtis-Slep show you how!
Prerequisites
You have some familiarity with JavaScript, React, and Next.
Setup a new project
Create a new Next project in the terminal.
Run this command: npx create-next-app@latest
Then you need to install the following packages:
create-next-app@14.0.4
Ok to proceed? (y) y
Give your project a name. We’ll call ours next-clerk-custom-login-forms
Continue setting up the Next project in the terminal:
Would you like to use TypeScript?  Yes
Would you like to use ESLint?  Yes
Would you like to use Tailwind CSS? Yes
Would you like to use `src/` directory?  No
Would you like to use App Router? (recommended) Yes
Would you like to customize the default import alias (@/*)? No
When your project is done setting up:
Change directories into your project by running this command in your terminal
cd your-project-name.Open it in VSCode by then running this command
code .(setup this command if you haven't)Install dependencies from the root folder of your project by running
npm i
Remove the Next boilerplate
Inside the app folder there is a file called page.tsx This has all the code that is rendered in the boilerplate.
Remove that code and keep a div or fragment for now. Here's an example:
// app/page.tsx
export default function Home() {
  return <div></div>;
}
Copy .env.local.example
At the root of the repo there's a file called .env.local.example
This has the environment variables needed to implement the custom auth pages.
Copy .env.local.example and create a new file called .env.local to store your environment variables.
!! be sure you have your .env.local in your .gitignore !!
Make an account on clerk.com
Once your account is created, click add application from your Clerk dashboard.
Type in your application name. Our login will allow you to authenticate with email and password. Clerk will store the user data in this example.
Setup Clerk in your project
Run this command in your terminal npm install @clerk/nextjs
When you’re logged into your clerk account, look at the left hand side of your dashboard under developers.
There's a button that says API Keys.
Click that and copy your NEXT_PUBLIC_CLERK_PUBLISHABLE_KEY and CLERK_SECRET_KEY into your .env.local and wherever you're deploying your project.
Wrap app in ClerkProvider
Wrap your app in the <ClerkProvider>.
Under app/layout.tsx we will wrap our app in the provider.
// app/layout.tsx
import type {Metadata} from "next";
import {Inter} from "next/font/google";
import "./globals.css";
import {ClerkProvider} from "@clerk/nextjs";

const inter = Inter({subsets: ["latin"]});

export const metadata: Metadata = {
  title: "Create Next App",
  description: "Generated by create next app",
};

export default function RootLayout({children}: {children: React.ReactNode}) {
  return (
    <ClerkProvider>
      <html lang="en">
        <body className={inter.className}>{children}</body>
      </html>
    </ClerkProvider>
  );
}
Create a middleware file
Clerk can require a login to access your app, certain pages, or allow any user access.
Create a middleware.ts file at the root of your project.
From the terminal, at the root of your project, run:
touch middleware.ts
Open middleware.ts. For this project we'll allow access to users but also have authentication
// middleware.ts
import {authMiddleware} from "@clerk/nextjs";

// This example protects all routes including api/trpc routes
// Please edit this to allow other routes to be public as needed.
// See https://clerk.com/docs/references/nextjs/auth-middleware for more information about configuring your Middleware
export default authMiddleware({
  //   publicRoutes: ["/"],
});

export const config = {
  matcher: ["/((?!.+\\.[\\w]+$|_next).*)", "/", "/(api|trpc)(.*)"],
};
Now you should be rendering out of the box Clerk auth components
Open your app locally by running this command npm run dev
You should see a login page that looks like this:
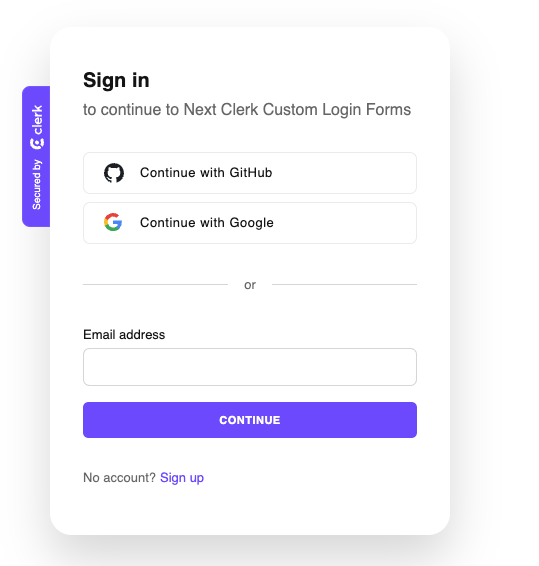
Next we want to route users to sign-up and sign-in components we create.
Setup components folder
Inside the app folder, create a new folder for components.
Run this terminal command from the root of the project:
mkdir app/components
cd app/components
touch SignupForm.tsx SigninForm.tsx VerifyForm.tsx
Create a sign-up component
Inside your app folder, create a new folder called sign-up. After that we'll create a folder within that folder called [[..sign-up]]. This will route our app to the component. Within [[...sign-up]], we'll create page.tsx. This will hold our sign up component logic.
In your terminal run:
mkdir app/sign-up
mkdir app/sign-up/[[...sign-up]]
touch app/sign-up/[[...sign-up]]/page.tsx
In app/sign-up/[[...sign-up]]/page.tsx, create your sign-up component:
// app/sign-up/[[...sign-up]]/page.tsx
"use client";
import Link from "next/link";
import { FormEvent, useState } from "react";
import { useRouter } from "next/navigation";
import { useSignUp } from "@clerk/nextjs";
import SignupForm from "@/app/components/SignupForm";
import VerifyForm from "@/app/components/VerifyForm";

const Signup = () => {
  const {isLoaded, signUp, setActive} = useSignUp();
  const [clerkError, setClerkError] = useState("");
  const router = useRouter();
  const [verifying, setVerifying] = useState(false);
  const [code, setCode] = useState("");

  const signUpWithEmail = async ({
    emailAddress,
    password,
  }: {
    emailAddress: string;
    password: string;
  }) => {
    if (!isLoaded) {
      return;
    }

    try {
      await signUp.create({
        emailAddress,
        password,
      });
      // send the email.
      await signUp.prepareEmailAddressVerification({strategy: "email_code"});

      // change the UI to our pending section.
      setVerifying(true);
    } catch (err: any) {
      setClerkError(err.errors[0].message);
    }
  };

  const handleVerify = async (e: FormEvent) => {
    e.preventDefault();
    if (!isLoaded) return;

    try {
      const completeSignUp = await signUp.attemptEmailAddressVerification({
        code,
      });
      if (completeSignUp.status !== "complete") {
        console.log(JSON.stringify(completeSignUp, null, 2));
      }

      if (completeSignUp.status === "complete") {
        await setActive({session: completeSignUp.createdSessionId});
        router.push("/");
      }
    } catch (err) {
      console.log("Error:", JSON.stringify(err, null, 2));
    }
  };

  return (
    <>
      {!verifying ?
        (<SignupForm signUpWithEmail={signUpWithEmail} clerkError={clerkError} />) :
        (<VerifyForm handleVerify={handleVerify} code={code} setCode={setCode} />)
      }
    </>
  )

};

export default Signup;
Now we'll create SignupForm.tsx, VerifyForm.tsx, and SigninForm.tsx.
Create the SignupForm
Head back to the components folder and the SignupForm.tsx file.
The code will be as follows:
// app/components/SignUpForm.tsx
import Link from "next/link";

interface SignUpFormProps {
  signUpWithEmail: ({emailAddress, password }:{emailAddress: string, password: string}) => void
  clerkError: string
}

const SignupForm = ({signUpWithEmail, clerkError}: SignUpFormProps) => {
  return (
    <div className="justify-center mt-12 grid justify-items-center md:mt-20">
      <div className="h-auto bg-blue-700 rounded-xl md:rounded-3xl w-80 md:w-96">
        <div className="p-6 md:p-8">
          <h1 className="mb-6 text-3xl font-light text-white">
            Sign Up
          </h1>
          <form
            onSubmit={(e) => {
              e.preventDefault();
              const target = e.target as typeof e.target & {
                email: {value: string};
                password: {value: string};
              };
              const email = target.email.value;
              const password = target.password.value;
              signUpWithEmail({emailAddress: email, password: password});
            }}
          >
            <input
              name="email"
              className="block w-full pb-4 pl-4 mb-3 text-sm font-light bg-transparent border-0 border-b-2 h-37 border-slate-600 text-white caret-slate-700 focus:border-white"
              placeholder="Email address"
              type="email"
              required
            />
            <input
              name="password"
              className="block w-full pb-4 pl-4 mb-3 text-sm font-light bg-transparent border-0 border-b-2 h-37 border-slate-600 text-white caret-slate-700 focus:border-white"
              placeholder="Password"
              type="password"
              required
            />
            <h2 className="text-red mb-8">
              {clerkError && <p>{clerkError}</p>}
            </h2>
            <button
              className="w-full h-12 mb-6 text-sm font-light text-white hover:text-blue-900 hover:bg-white bg-slate-700 rounded-md"
              type="submit"
            >
              Create an account
            </button>
          </form>
          <p className="text-sm font-light text-center text-white">
            Already have an acccount?
            <Link className="ml-2 text-slate-200" href="/sign-in">
              Login
            </Link>
          </p>
        </div>
      </div>
    </div>
  );
};

export default SignupForm
Create the VerifyForm
Clerk sends users that signup with email and password an email with a verification code. The VerifyForm is where they'll enter that code.
Here's the code for the VerifyForm:
// app/components/VerifyForm.tsx
import { FormEvent } from "react"

interface VerifyFormProps {
    handleVerify: (e: FormEvent) => void
    code: string
    setCode: (value: string) => void
}

const VerifyForm = ({handleVerify, code, setCode}: VerifyFormProps) => {
  return (
    <div className="flex justify-center mt-12 grid justify-items-center md:mt-20">
      <div className="h-auto bg-blue-700 rounded-xl md:rounded-3xl w-80 md:w-96">
        <div className="p-6 md:p-8">
          <h1 className="mb-6 text-3xl font-light text-white">
            Verification Code
          </h1>
          <form onSubmit={handleVerify}>
            <input
              value={code}
              className="block w-full pb-4 pl-4 mb-3 text-sm font-light bg-transparent border-0 border-b-2 h-37 border-blue-900 text-white caret-slate-700 focus:border-white"
              id="code"
              name="code"
              onChange={(e) => setCode(e.target.value)}
            />

            <button
              className="w-full h-12 mb-6 text-sm font-light text-white hover:text-blue-900 hover:bg-white bg-slate-700 rounded-md"
              type="submit"
            >
              Complete sign up
            </button>
          </form>
        </div>
      </div>
    </div>
  );
}

export default VerifyForm
Create the SigninForm
// app/components/SignInForm.tsx
import Link from "next/link";
import { FormEvent } from 'react'
interface SignInFormProps {
signInWithEmail: ({
emailAddress,
password,
}: {
emailAddress: string;
password: string;
}) => void;
clerkError: string;
}
const SigninForm = ({signInWithEmail, clerkError}: SignInFormProps) => {
return (
<div className="justify-center mt-12 grid justify-items-center md:mt-20">
<div className="h-auto bg-blue-700 rounded-xl md:rounded-3xl w-80 md:w-96">
<div className="p-6 md:p-8">
<h1 className="mb-6 text-3xl font-light text-white">
Sign In
</h1>
<form
onSubmit={(e) => {
e.preventDefault();
const target = e.target as typeof e.target & {
email: {value: string};
password: {value: string};
};
const email = target.email.value;
const password = target.password.value;
signInWithEmail({emailAddress: email, password: password});
}}
>
<input
name="email"
className="block w-full pb-4 pl-4 mb-3 text-sm font-light bg-transparent border-0 border-b-2 h-37 border-slate-600 text-white caret-slate-700 focus:border-white"
placeholder="Email address"
type="email"
required
/>
<input
name="password"
className="block w-full pb-4 pl-4 mb-3 text-sm font-light bg-transparent border-0 border-b-2 h-37 border-slate-600 text-white caret-slate-700 focus:border-white"
placeholder="Password"
type="password"
required
/>
<h2 className="text-slate-700 mb-8">
{clerkError && <p>{clerkError}</p>}
</h2>
<button
className="w-full h-12 mb-6 text-sm font-light text-white hover:text-blue-900 hover:bg-white bg-slate-700 rounded-md"
type="submit"
>
Sign in
</button>
</form>
<p className="text-sm font-light text-center text-white">
Don't have an acccount?
<Link className="ml-2 text-slate-200" href="/sign-up">
Sign up
</Link>
</p>
</div>
</div>
</div>
);
};
export default SigninForm;
Create a sign-in component
Now we will run the same steps for our sign-in component
In your terminal run
mkdir app/sign-in
mkdir app/sign-in/[[...sign-in]]
touch app/sign-in/[[...sign-in]]/page.tsx
Clerk has documentation about creating custom flows for sign-up and sign-in. Be sure to check it out as it helped us implement these components!
In that page.tsx, create your sign-in component
// app/sign-in/[[...sign-in]]/page.tsx
"use client";
import Link from "next/link";
import {useState} from "react";
import {useRouter} from "next/navigation";
import {useSignIn} from "@clerk/nextjs";
import SigninForm from "@/app/components/SigninForm";

const Signin = () => {
  const {isLoaded, signIn, setActive} = useSignIn();
  const [clerkError, setClerkError] = useState("");
  const router = useRouter();

  const signInWithEmail = async ({
    emailAddress,
    password,
  }: {
    emailAddress: string;
    password: string;
  }) => {
    if (!isLoaded) {
      return;
    }

    try {
      const result = await signIn.create({
        identifier: emailAddress,
        password,
      });
      if (result.status === "complete") {
        console.log(result);
        await setActive({session: result.createdSessionId});
        router.push("/");
      } else {
        console.log(result);
      }
    } catch (err: any) {
      console.log(JSON.stringify(err, null, 2));
      setClerkError(err.errors[0].message);
    }
  };

  return (
    <SigninForm signInWithEmail={signInWithEmail} clerkError={clerkError} />
  );
};

export default Signin;
Test your signup component
In your middleware file, bring back the line in the authMiddleware function (it's on line 7). Your file will now look like this:
// middelware.ts
...
export default authMiddleware({
  publicRoutes: ["/"],
});
...
Go back to the page.tsx file where you removed the Next boilerplate from initially.
The file should now look like this:
// app/page.tsx
"use client";
import {UserButton, useUser} from "@clerk/nextjs";
import Image from "next/image";
import Link from "next/link";

export default function Home() {
  const {isSignedIn, user, isLoaded} = useUser();

  return (
    <div className="text-center flex flex-col gap-4 content-center h-screen items-center">
      <h1 className="text-2xl mt-4">Hello!</h1>
      {isSignedIn && <h1 className="text-2xl">You are logged in!</h1>}
      <div className="flex align-center justify-center">
        {!isSignedIn ? (
          <div className="flex gap-2">
            <div className="px-3 py-2 mb-6 text-xl font-light text-white hover:text-blue-900 hover:bg-white bg-slate-700 rounded-md">
              <Link href="/sign-up" className="self-center">
                Signup
              </Link>
            </div>
            <div className="px-3 py-2 mb-6 text-xl font-light text-white hover:text-blue-900 hover:bg-white bg-slate-700 rounded-md">
              <Link href="/sign-in" className="self-center">
                Login
              </Link>
            </div>
          </div>
        ) : (
          <UserButton afterSignOutUrl="/" />
        )}
      </div>
    </div>
  );
}
Add these environment variables to your .env.local:
// .env.local
NEXT_PUBLIC_CLERK_SIGN_IN_URL=/sign-in
NEXT_PUBLIC_CLERK_SIGN_UP_URL=/sign-up
NEXT_PUBLIC_CLERK_AFTER_SIGN_IN_URL=/
NEXT_PUBLIC_CLERK_AFTER_SIGN_UP_URL=/
This will route the pages to the custom components. Do this wherever your app is deployed too.
Voilà! Your login component should now look like this:
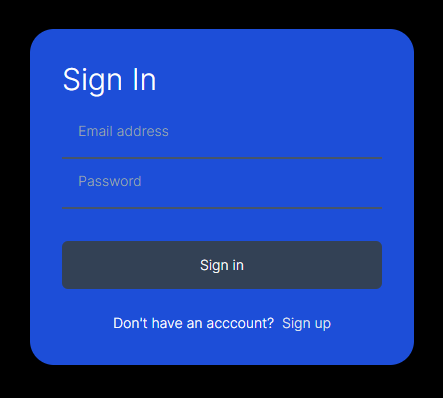
Take a look at the repo for this project if you'd like!
Questions, critcisms, or comments? Please sound off! Steve Smodish and Alex Curtis-Slep are devs, check out Steve and Alex's Github.